I'm glad you guys enjoyed last week's Part 1 of 3 Ways To Make Your Food Photography Stand Out. This is a three part series for new bloggers to improve their food photography skills. It's for anyone too so whether you use a camera phone or DSLR these tips are for you!
I tried doing everything in one post, but it became a MEGA post that I'm sure no one would be patient enough to read so I split in three's. In case you missed the part one, be sure to check out last week's post for my first food photography tip. With that, let's get to today's part two photography tip.
3 Ways To Make Your Food Photography Stand Out: Part 2
Tip# 2: Back Away From The Food
One of the mistakes I see bloggers repeatedly make is getting too up close and personal with the food. I make this mistake at times and during editing wonder what the heck was I thinking? A lot of camera phone users are guilty of this. Next time you find the urge to take a picture up close and personal think about how you would feel if someone shoved a plate of food up to your nose and said look at this! It's overwhelming, right? Well, that's what it feels like to your readers.
Here's an example of a Trader Joe's post on social media a few weeks ago. It made my eyeballs pop out and spin. The food is way too close. TJ's social media needs some serious food photography help.
A good rule of thumb is to have 1/2 your picture be of the actual food. Anything more is too overwhelming to the eye. A good way to do this, especially if you're using a camera phone is by shooting overhead. Stand on a chair or small step stool and look down at the food holding the camera parallel to the food.
Did you know bloggers started the overhead trend in food photography? Professional food photographers didn't do this. It was bloggers. I imagine that's because so many bloggers were amateurs and discovered this angle easiest to get a good shot.
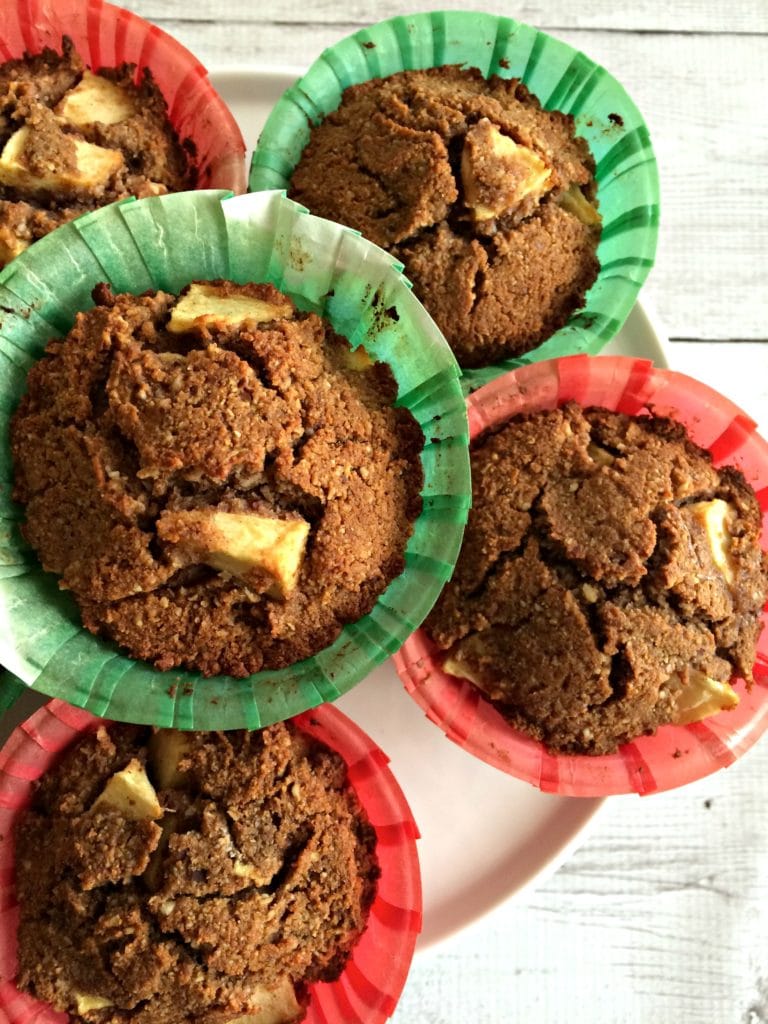
An example of my Grain Free Apple Cinnamon Muffins taken with an iPhone. This shot isn't horrible because I had good lighting, but it definitely breaks the 1/2 of the food in the picture rule and it's too close. It's a shame, I love these muffins! I'll likely re-shoot them someday.
You can get really amazing pictures overhead and it's easy to to do. I also think this is a good place to start for beginners. As you begin to understand how light and shadows work, you can play around with other angles. Overhead is almost always a guaranteed good shot when you have the appropriate lighting.
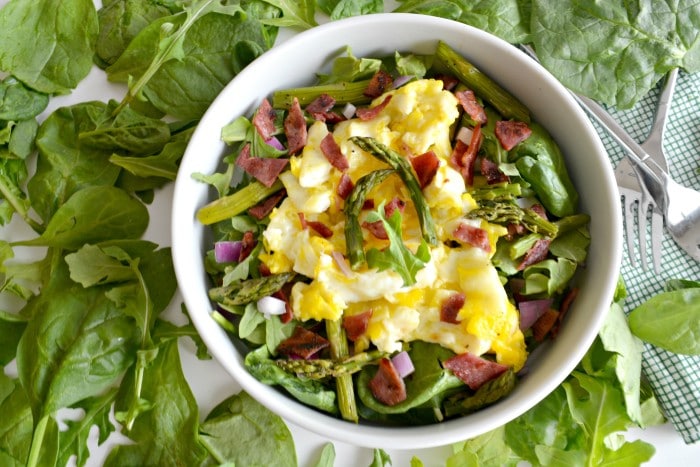
Here's an example of Eggs Benedict Salad as an overhead with my DSLR. From this angle, you can zoom in and out as needed without moving the camera closer to the food.
In my opinion, it's better to be farther away than too close. You can always crop the picture later if you discover the object is too far away, but you can never get that space back. Notice that 1/2 the food is the picture too.
If you need a closer shot of an object, you can do this by moving away from the center of the dish. Think about taking a picture of half the dish from overhead. You can also make piles of food like cookies or muffins and snap the picture off center with the food to the right or left of center.
It's more visually interesting to have the focal point out of the center (again the 1/2 of the food picture rule). Play around with it. I love messing around with focal points. It always surprises me in editing how much more interesting and appealing it makes things appear.
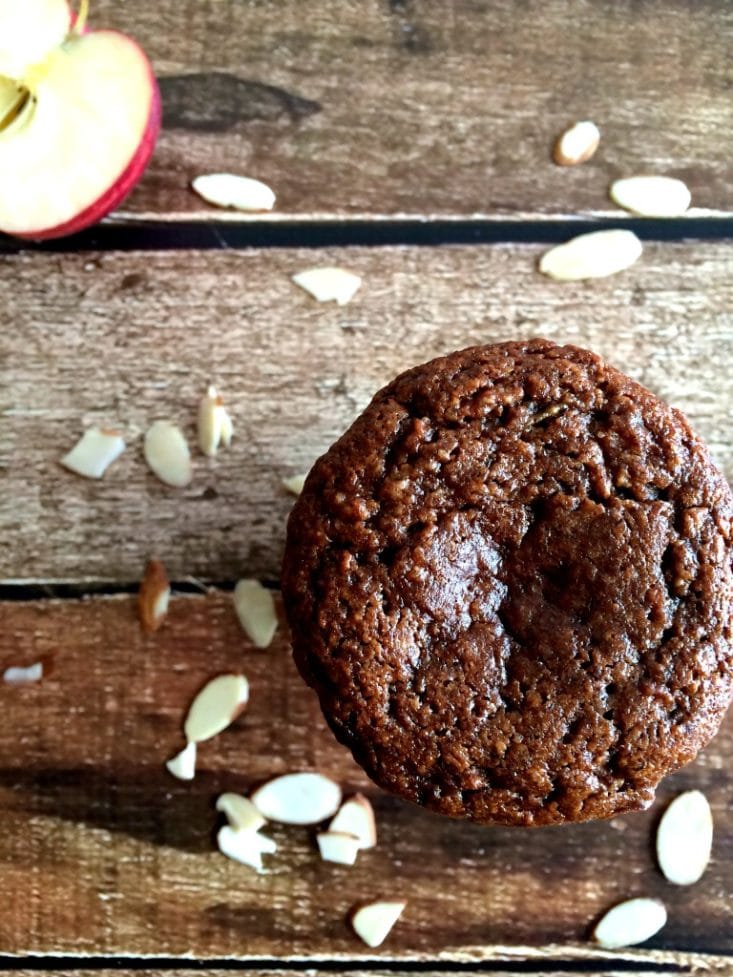
An example of Zucchini Apple Spice Muffins taken with my iPhone. I shot one single muffin in the right lower corner of the frame. Even though it's one muffin, it's more visually appealing especially with the apple in the corner and props which we will get to in part three.
And there you have it! My second tip for making your food photography stand out. Many of these tips and more I learned by reading this photography book which I highly recommend you buy. I still reference it to this day to improve my shots. It was the best money I invested in my blog.
Also, checkout my store for my photography and baking accessory favorites. These are tools and props I use regularly. As I discover new things, I add them to the store so be sure to check back from time to time. Snap happy!

I agree with this post! I like getting the up close and personal shot as I play with the depth of field but when I get them on the computer I'm like ugh why did I think this was a good idea? So now I try to create more of a "display" with the recipe ingredients and finished product and take lots of pictures from multiple angles. Thanks for the advice!
I still find myself doing it too. It's just natural to think closer is better when the shot isn't working out the way you want it to. Glad you found the tips helpful!
Oh man I love these tips! I struggle the most with props, and finding my way to make food exciting! I love this 1/2 of the picture rule!! Great advice for beginners and also a great reminder for me too! I cringe when I go back to my old shots!
YES! The overhead shot is a much easier one to take as an amateur as well! Good tips, Megan! 🙂
Thanks, Ashley! It's still one of my favorite angles for shooting.
Oh man, this is such a great reminder and I have to tell myself this all the time!!! I can't help sneaking up closer and closer on my dang food 🙂 Loving your little series, can't wait for the last tip!
Thanks, Leslie! I'm glad your finding them helpful. I tried to keep things simple.
I was basically sticking my camera right into my food in my early days of blogging, and while I think it can occasionally be good to show certain textures, it's usually a better idea to take a step back. Great advice 🙂
I did the same. I love looking back & seeing how far I've come.
Lots of great tips here. I am always working on my photography, but I really need to work on props and styling.
Styling is next week's tip. Be sure to check back!
Thanks for sharing these tips! As someone who is trying to work on her photography, these tips are super helpful. Especially the up close shot, because I love getting all up and personal with my food! I do see that you can lose the overall visual picture of the food though. Keep the tips coming!!
Oh good! I'm glad you're finding them helpful Kat.
Please come and redo all of my food photography. For me, lighting and level are by far the hardest!
Would love to! If only you lived closer. 🙁
I don't do many food posts because I'm terrible at styling and photographing food. Hopefully with practice and great tips like these will help me get more great photos!
Keep working on it. You will get the hang of it. Next week's tip is about styling so be sure to check back!
Love your photos and love your advice 🙂 I sometimes don't know when to get closer and when not to!
When in doubt, make 1/2 the picture of the food! Once you start doing that, you'll get the hang of it.